# Overview
Once you have configured your registration site's appearance and entry form, you can launch your site. If you see the message "press Launch to begin" at the top of the screen, it means your site has not yet been initiated.
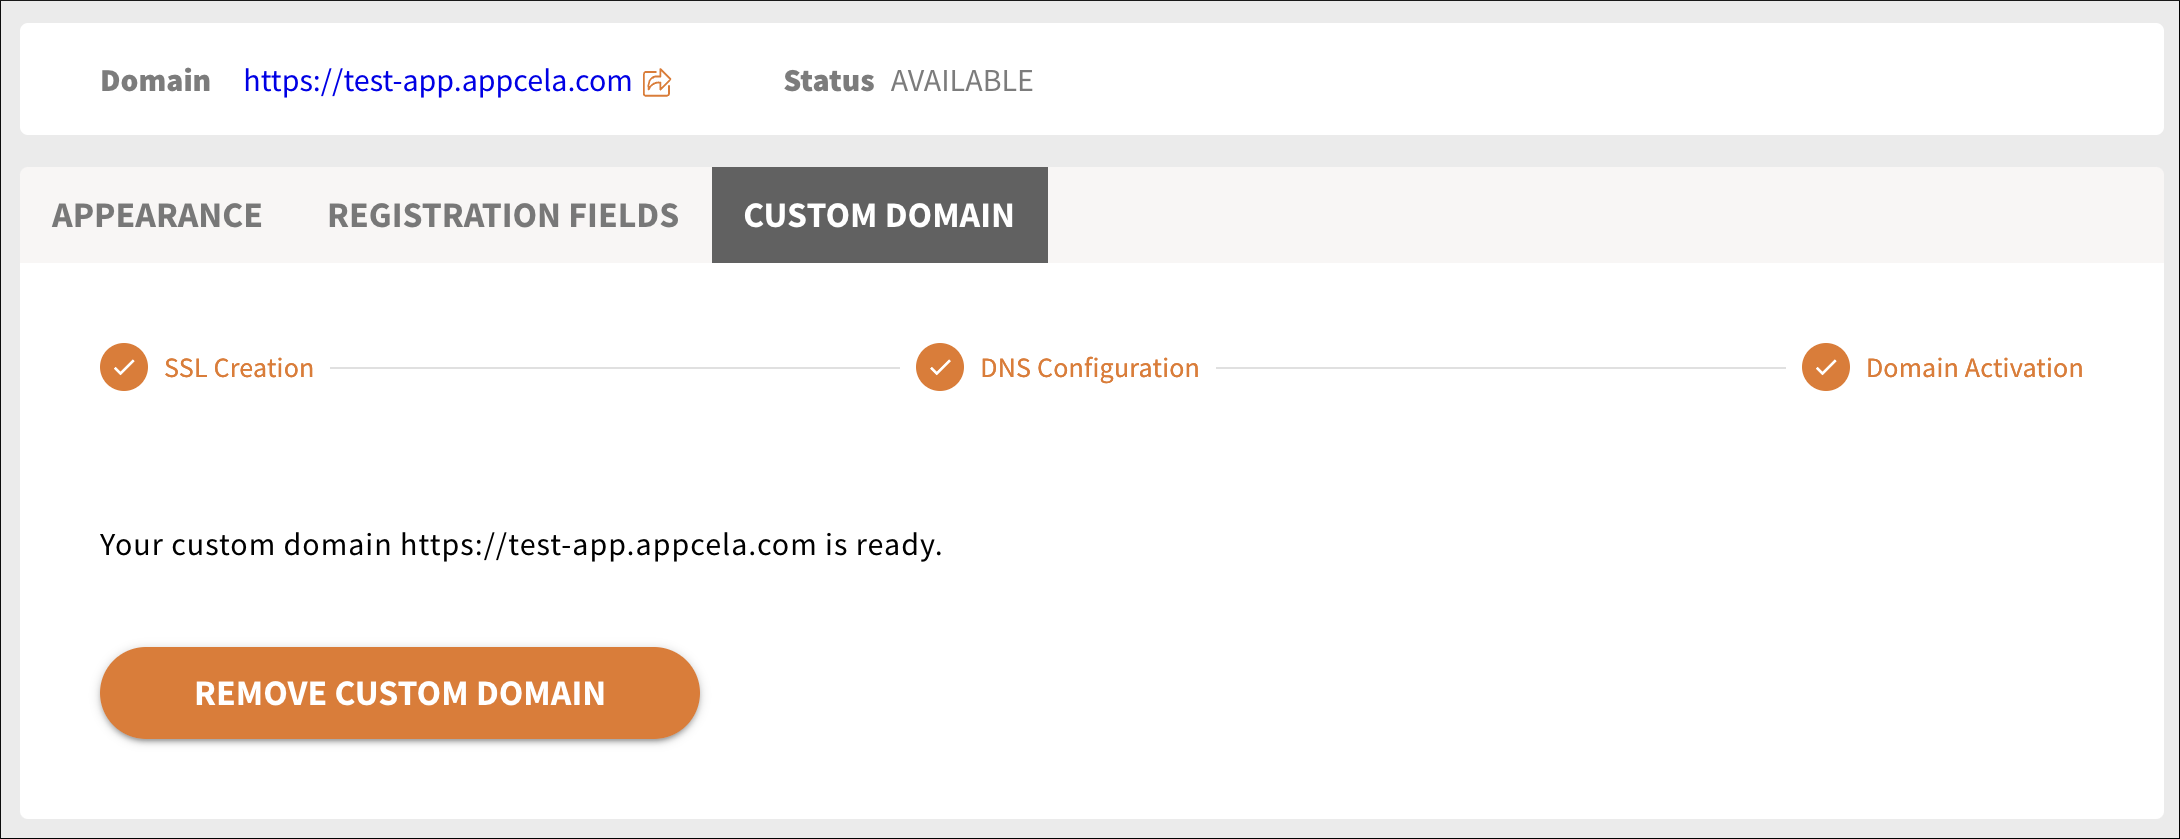
# Defining Your Custom Domain
With a paid account, you can specify a custom domain at which to host your site.
TIP
If you are using a custom domain, you must make the DNS entry on the screen to route traffic from your custom domain (e.g., register.acme-prime.com) to the form hosted by QuickReg®.
If you do not know how to make this change, you should contact someone that manages your existing website and domain.
If you do not wish to use a custom domain (or are on a Free plan), QuickReg® will host registration at its domain. For example, acme-prime.quickreg.me.
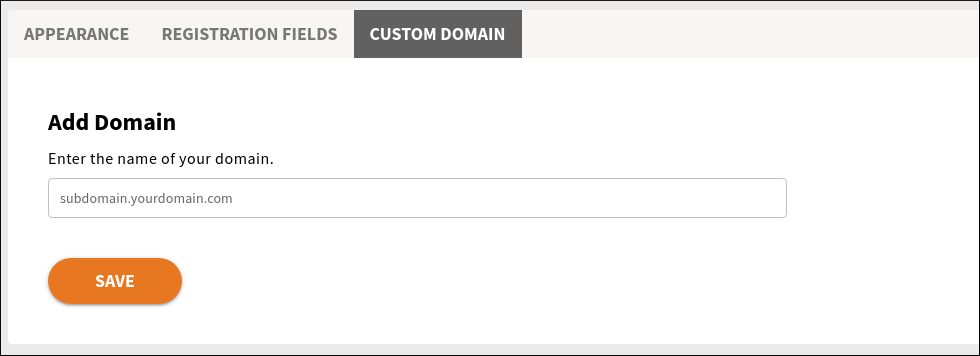
To define a custom domain, enter it on the Custom Domain tab and click Save.
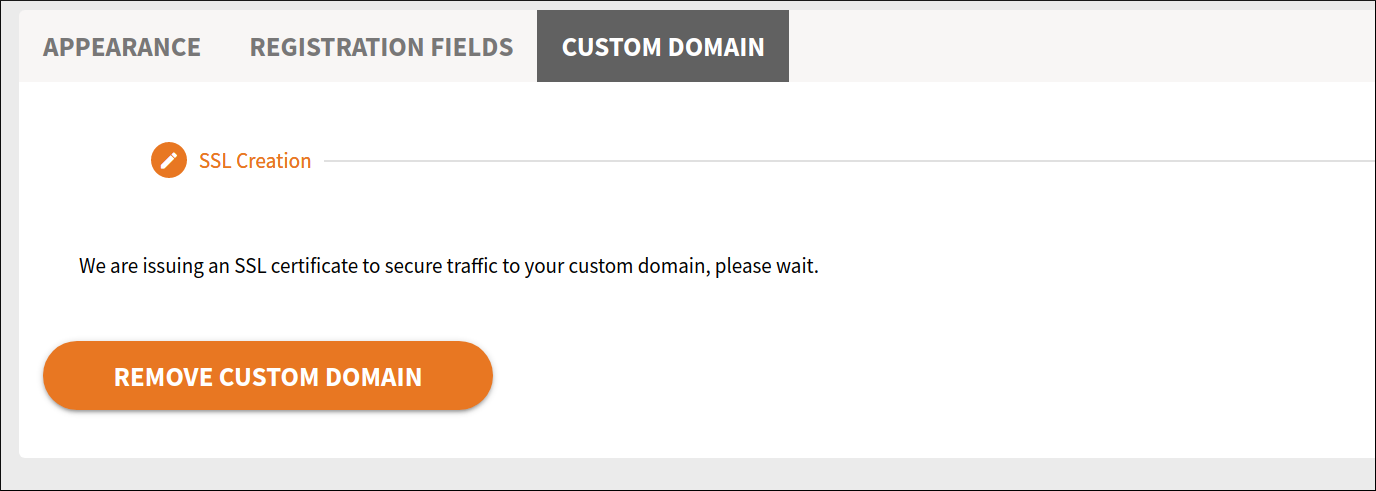
The wizard will go through the steps automatically. An SSL certificate will be created to connect to the domain.
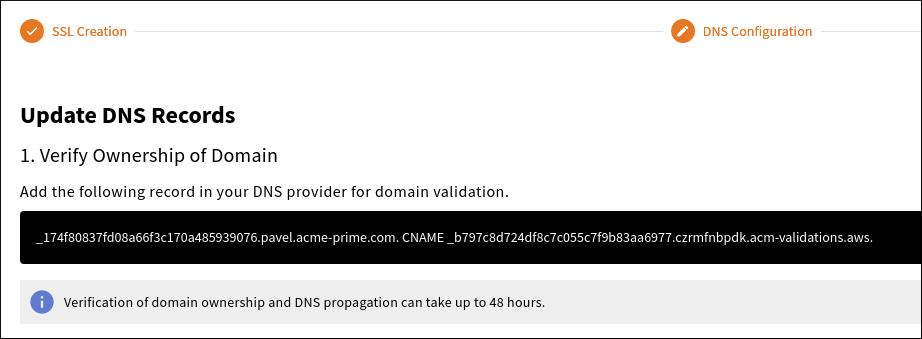
Next, you will receive a validation record. Add the validation record to your DNS provider to verify domain ownership.
The domain is pending deployment.

You will need to configure the DNS provider to point the custom domain to our registration site. DNS propagation may take from 15 minutes to 48 hours.
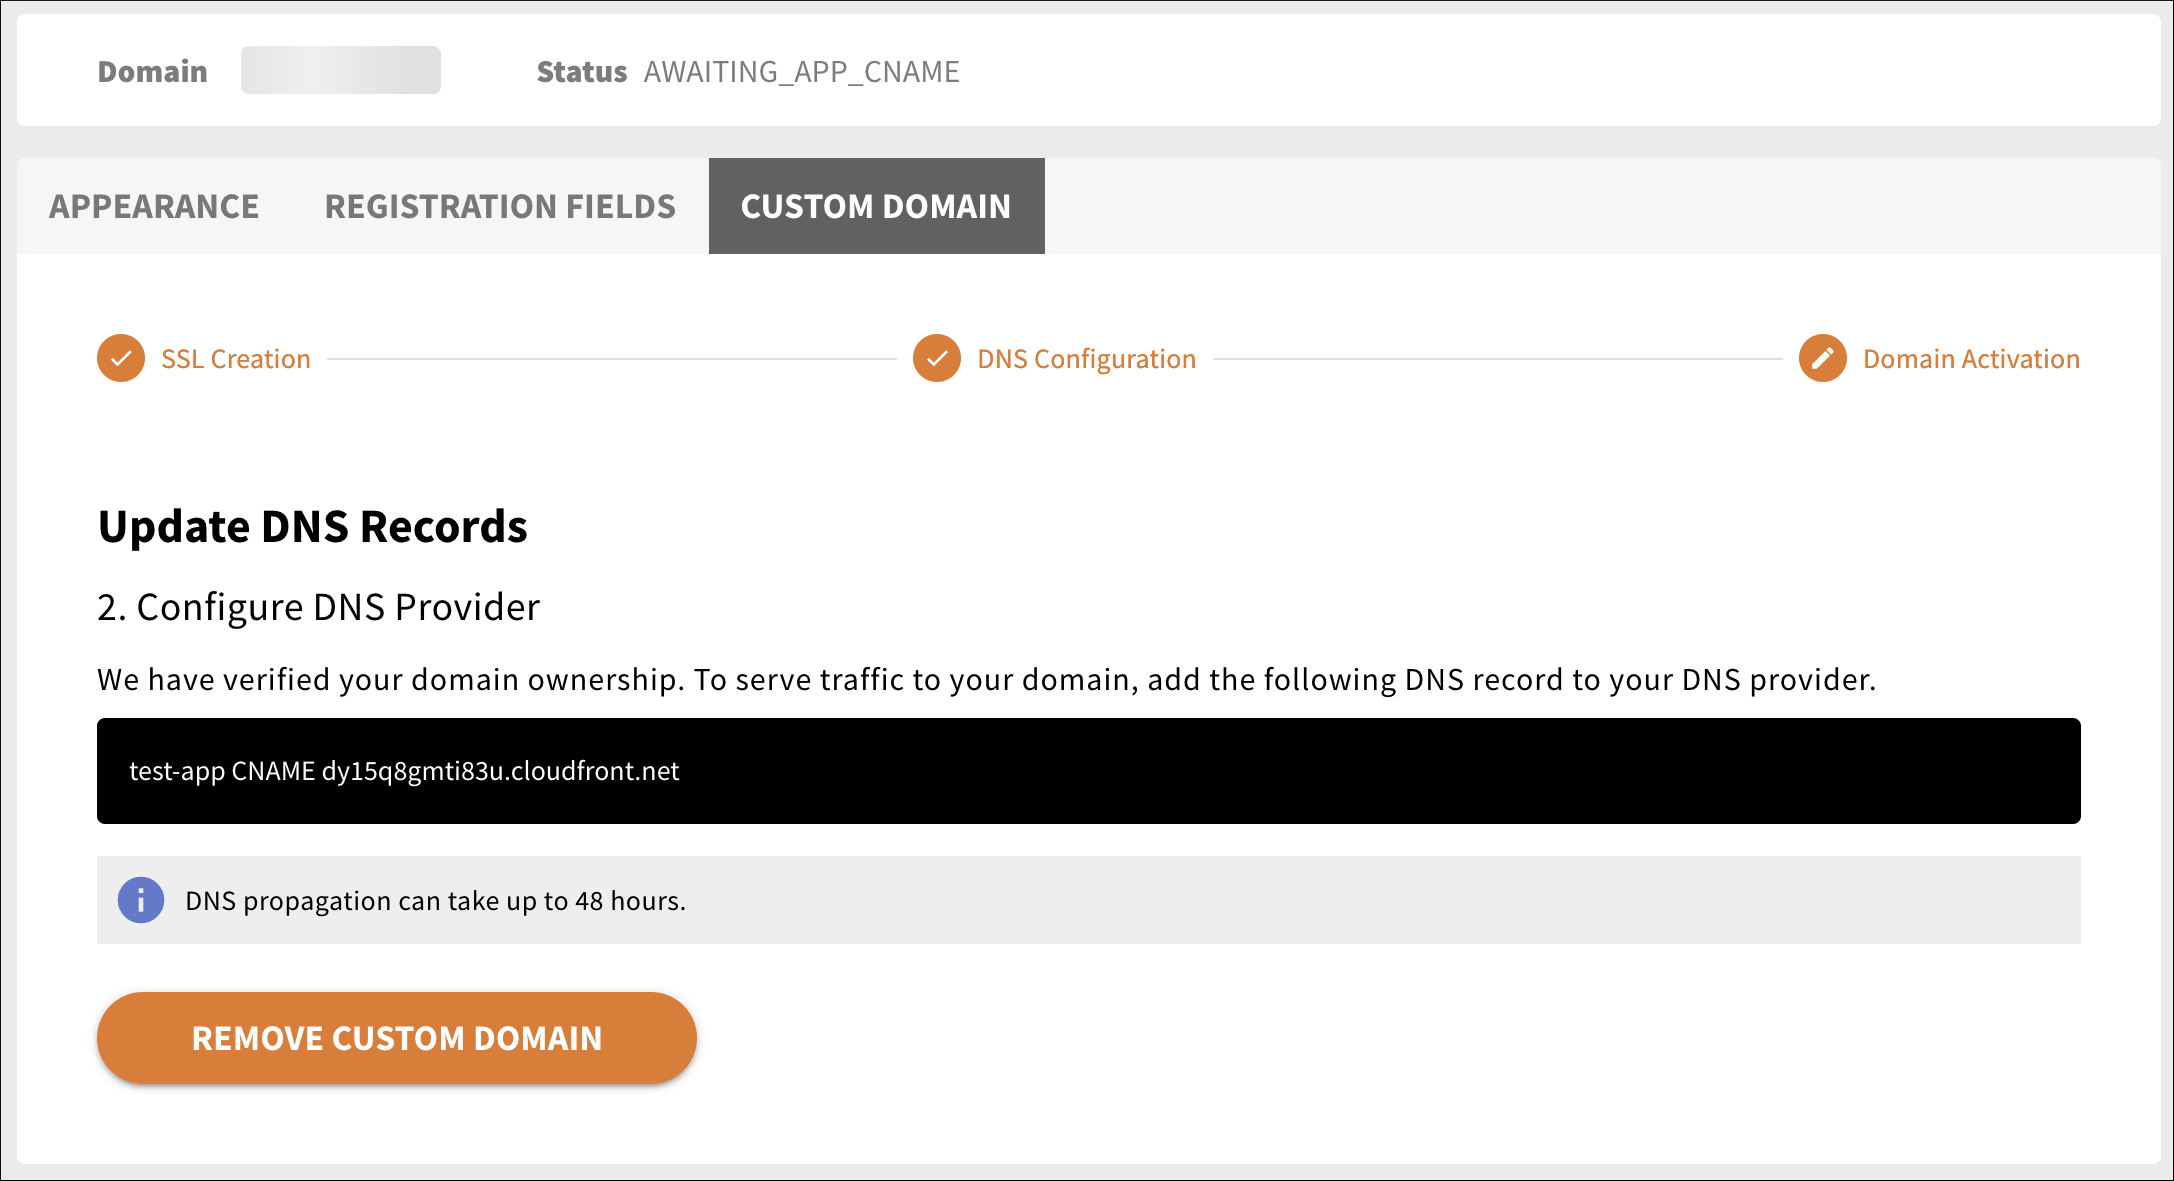
After the DNS provider points your domain name to our registration site, your new custom domain will be ready.
# Launching Your Site
To begin the process, click the Launch button. Once you initiate the process, you can expect several status messages to be displayed. These indicate that the application is performing various tasks, which generally take several minutes to complete.