# Accessing Code Manager
NOTE
To use Code Manager, you must be a member of the Code Manager Users group. To learn how to update user group membership, read Access Permissions.
To access Code Manager, select it from the left navigation menu. Use Code Manager to create QR codes and upload existing QR codes into your library.
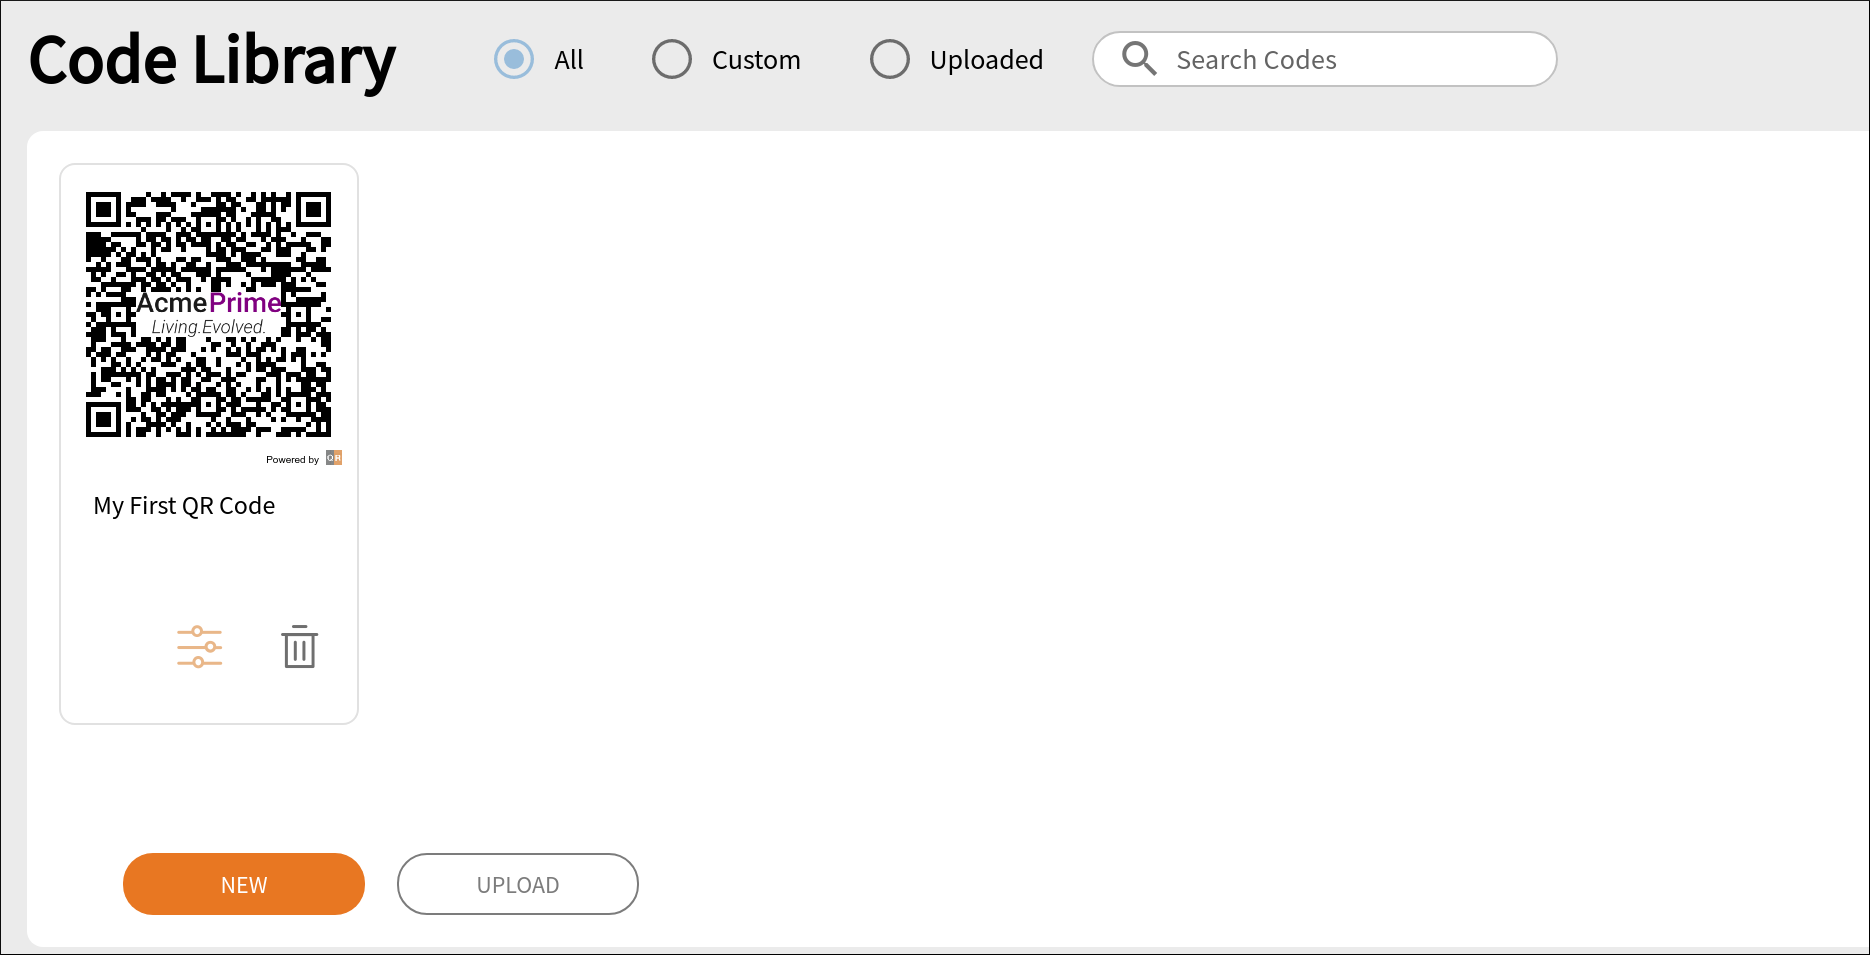
The Code Library is displayed when you open Code Manager. You will see a collection of your saved codes.
To filter QR codes, use the radio buttons at the top of the Code Library or type a key word in the search box.
# Creating QR Codes
NOTE
Because QR codes designed for the web will embed your registration form's URL, you should define your domain first. Please read Launching Your Site for more details.
If you are not familiar with QR codes, it may be helpful to review the QR Codes Best Practices document before creating your first code.
Before using a QR code in production, ensure that it has been thoroughly tested using realistic proofs and on various mobile devices.
To create a new code, click the orange New button at the bottom of the Code Library. You use the same form to create a new code or edit an existing one. The form is organized into three tabs.
As you design and edit your QR code, a preview code will be displayed on the right side of the screen. You can test this with your mobile device at any time.
When you create a new QR code, you begin by specifying several options related to the content that will be encoded into the scannable code.
# Content
You will give a name to the code and, optionally, a description. When naming codes, you may consider that your library will grow as you create more codes, and well-structured names and the inclusion of meaningful words will help when browsing and searching for codes later.

As you modify your code, the preview control on the right will change dynamically in response to your edits. Below the QR code, you will also have a link that you can use to test the URL in real-time.
# Channel Options
By default, the web channel is selected when creating new codes. These codes will take the customer to a particular web URL e.g., https://acme-prime.quickreg.me (opens new window). As mentioned above, this domain is defined when you define your domain.
# Product Options
You can embed additional information into the QR code related to products.
NOTE
You can create a QR code without product information. Such codes will take visitors to your QuickReg® account homepage. Making QR codes with product-related data provides a more efficient experience during registration.
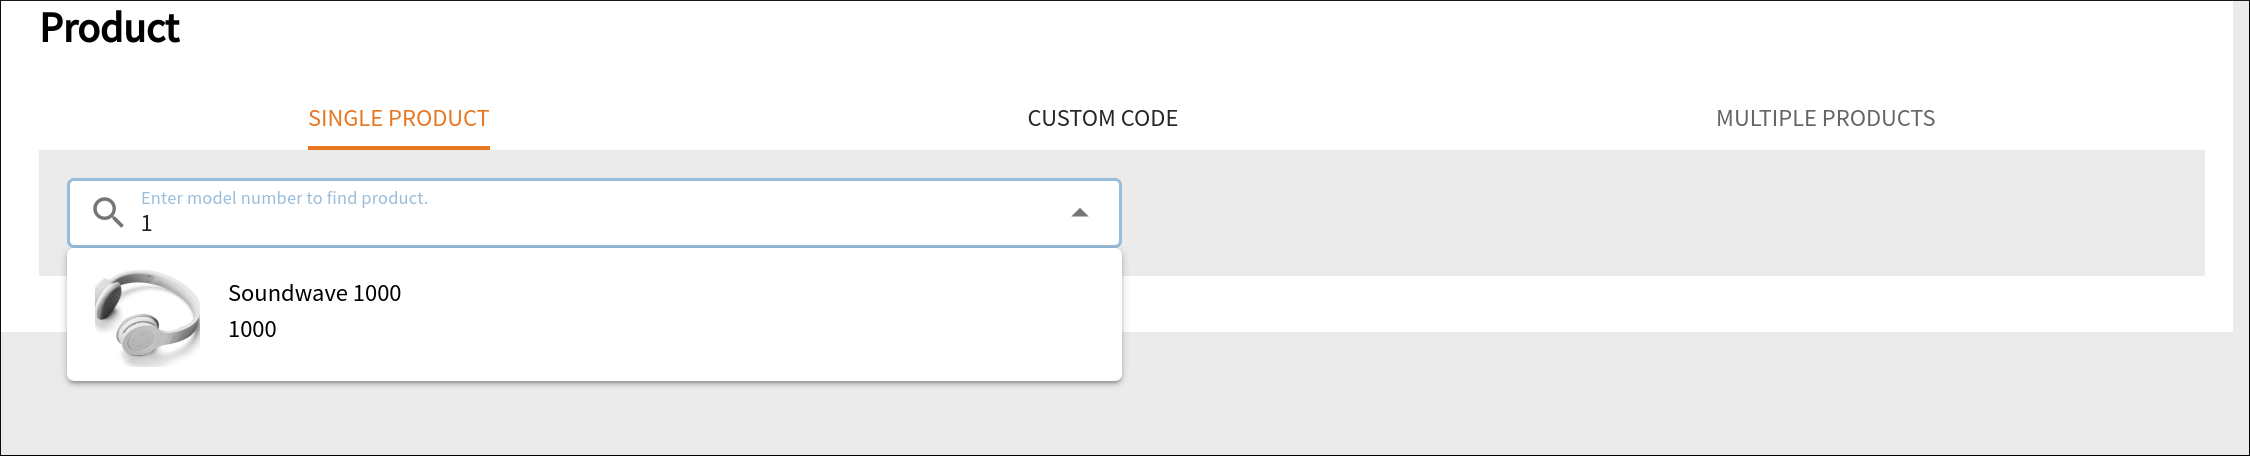
# Single Product
TIP
Create a product record first to use this feature.
To select a product:
- Start typing a product serial number in the search box.
- Select the product from the drop-down list.
Once you select a product, it will display on the page, and you may change the product using the edit icon or by searching for a new product and selecting enter. Similarly, you can remove the product by either pressing the ⓧ icon in the search area or using the trashcan icon.
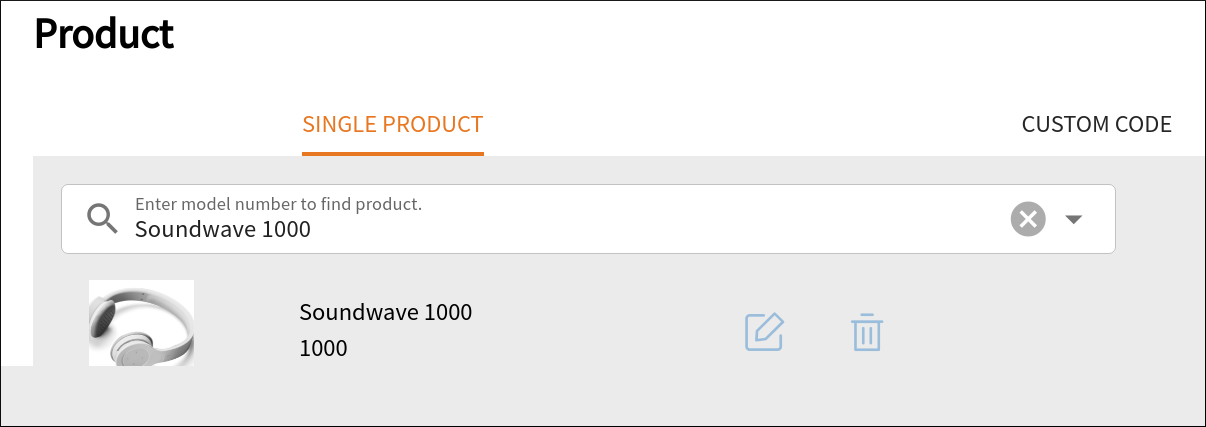
When you add a product this way, the URL in the right panel will update with a query string parameter called 'model'.

# Custom Codes
This feature allows custom fields, such as the model and serial number, to be encoded into the QR code. For example, this feature can be used in low-volume manufacturing and assembly to create individualized codes.
NOTE
This feature is not available in the free version. In other versions, the values must be defined so that codes will scan properly. In this example, we kept the same product we selected above and added a serial number.
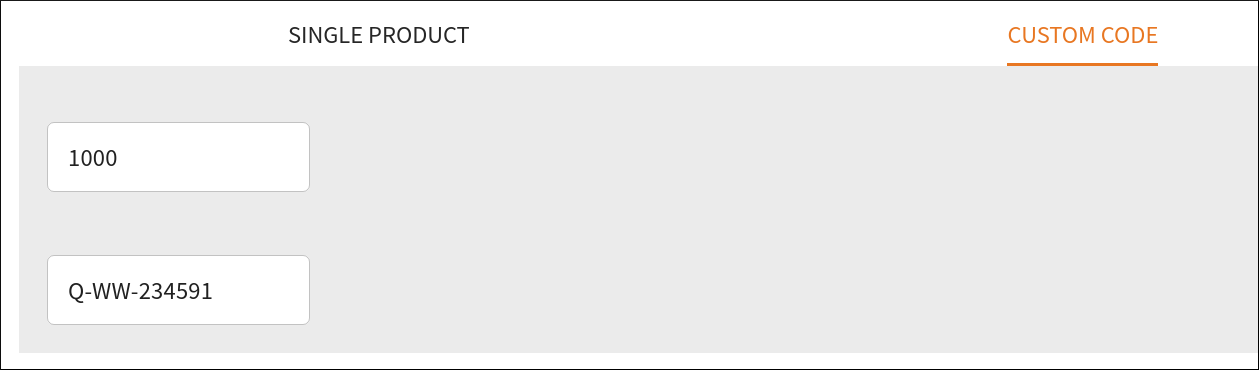
As before, the URL in the right panel will update, this time with a query string parameter called 'sn'.

# Multiple Products
You may also associate a code with multiple products using a keyword. For example, you may want a landing page for products tagged with 'Kitchen' or a different SMS workflow for 'Kitchen' versus 'Laundry' products.
NOTE
This feature is currently disabled in certain versions.
# Style
Style options control the look of your codes. Several of these features are only available in premium subscriptions, so they may not be available to you.
# Center Logo (Premium)
A logo can be embedded in the center of the QR code. Click the plus symbol and upload an image to add it. A thumbnail of your image will be displayed, and the rendered code will update.
To remove the logo, click the minus symbol.
![]()
When you add a logo image, the preview to the right will render the QR code.
![]()
# Error Correction Level
QR codes support different error correction levels, which can be helpful depending on the application of the QR code. See QR Code Best Practices for more detailed information. When you change the error correction level, your QR code will change dynamically.

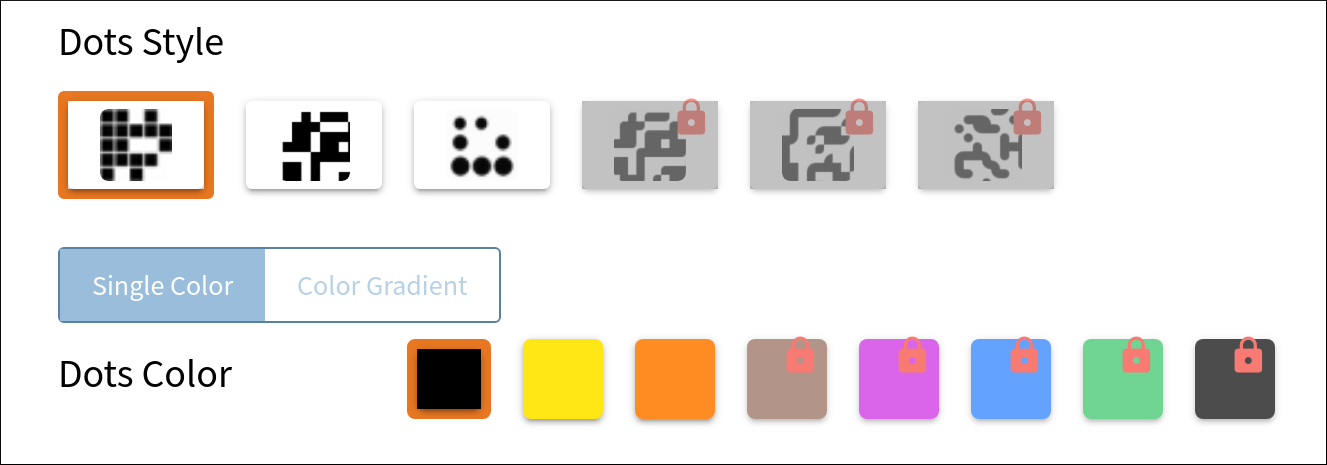
# Patterns
The dot style and color can be changed for your code. The default styles are safe in most settings, but different styles and colors may work better in your setting (for example, to support branding).
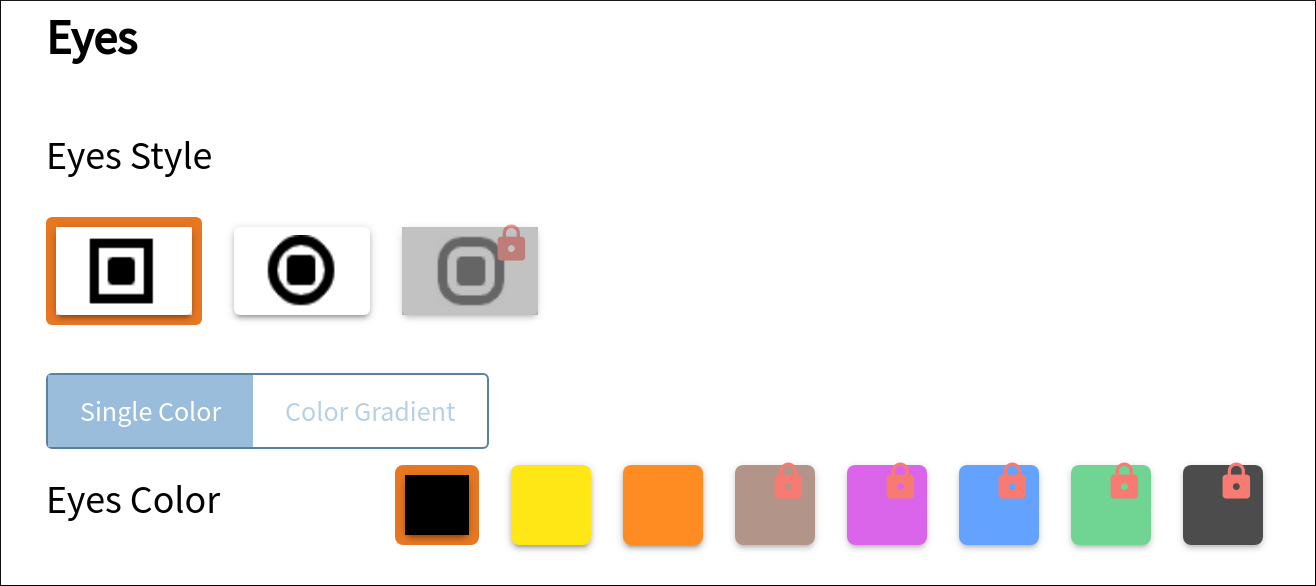
# Eyes
Similarly, the eye style (the larger elements at three corners) and their color can be changed for your code. The default styles are safe in most settings, but different styles and colors may work better in your setting (for example, to support branding).
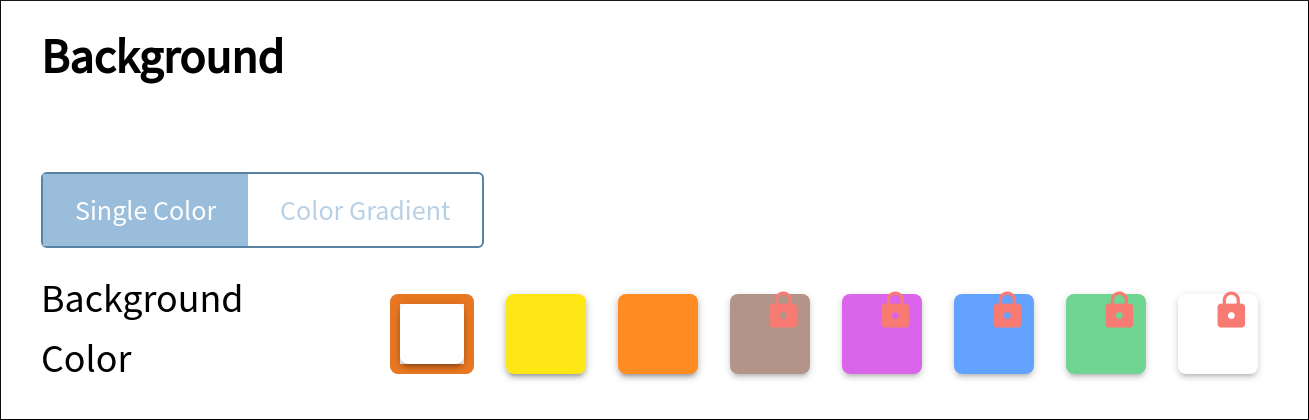
# Background Color
The background color is another significant styling property that can be altered. White is the default and is best for most applications.
WARNING
QR code readers depend on having sufficient contrast levels before foreground and background. We advise caution and thorough testing when changing colors.
# Footer Credit (Premium)
With a free account, the QR logo will be displayed at the bottom of the code and cannot be removed. For premium subscriptions, this setting is configured globally, but the global setting can be overridden on this screen.

# Tags
You can create keyword tags for your codes. These can then be used to power search filters with the admin console. Select from existing tags or enter a new one.

# Testing QR Codes
To test a QR code, export it using Code Manager, print out a copy, place it in a setting similar to where it will be used, and scan it with a mobile phone. This type of field testing is a quick way to gauge whether the code is likely to work well.
# Editing QR codes
To edit any code, click its card to open the data entry form.
# Deleting QR Codes
To delete a code, click the trashcan icon for the code and confirm that you want to delete it.